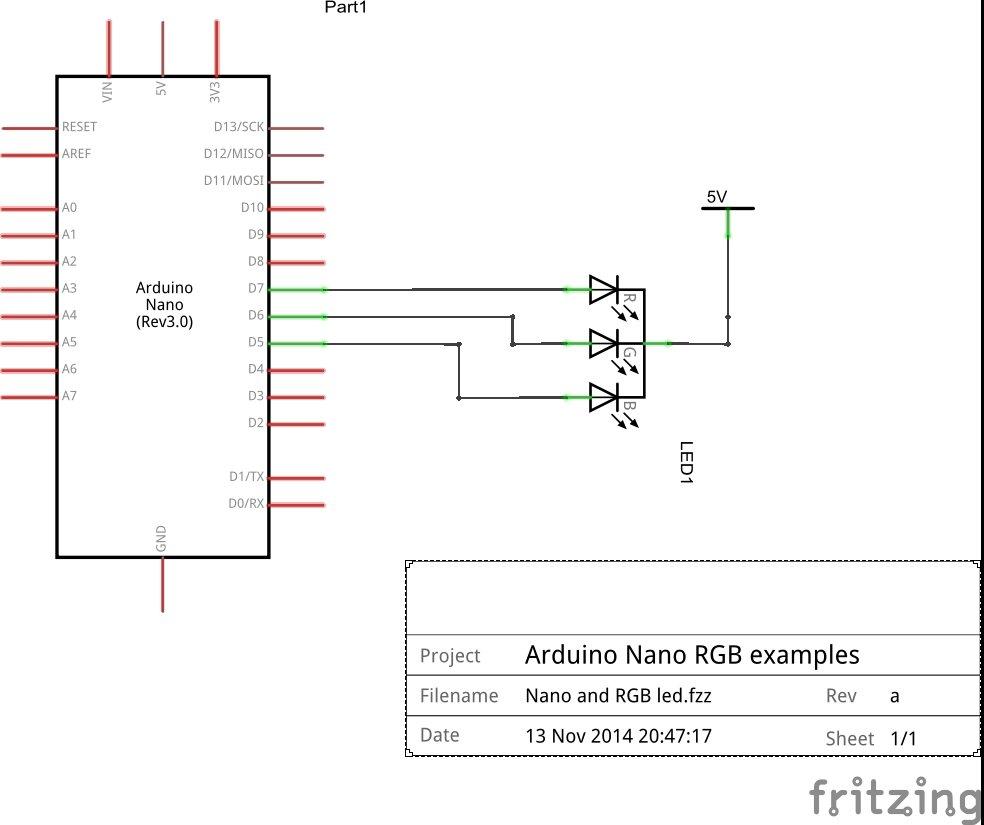
In this example we connect an RGB LED to our Arduino. We used an Arduino Nano, a Nano shield and an RGB LED breakout. The aim is to create a simple example that will flash the reg, green and blue leds individually
Red LED is connected to D7
Blue LED is connected to D6
Green LED is connected to D5
The RGB LED used is a common anode type, this means that to light an LED you have to set the output to low, this will light the required LED, setting the output high will switch off the LED.
Schematic
Code Examples
int REDLED =7;
int BLUELED =6;
int GREENLED = 5;
void setup()
{
pinMode(REDLED, OUTPUT);
pinMode(GREENLED, OUTPUT);
pinMode(BLUELED, OUTPUT);
}
void loop()
{
AllOff();
digitalWrite(REDLED, LOW);
delay(500);
AllOff();
digitalWrite(GREENLED, LOW);
delay(500);
AllOff();
digitalWrite(BLUELED, LOW);
delay(500);
}
void AllOff()
{
digitalWrite(REDLED, HIGH);
digitalWrite(GREENLED, HIGH);
digitalWrite(BLUELED, HIGH);
delay(500);
}
Resources
Prototype Shield I/O Extension Board Expansion Module for Arduino Nano V3.0
Nano v3.0 Compatible with Arduino
4 Pin Terminals RGB 3-Color LED Lamp Module for Arduino

